If it seems like I'm borrowing an oft-used phrase from the Realty world, well yes, in fact I am. But, my "Preparation" phrase is meant for homeowners embarking on the renovation and building trail.
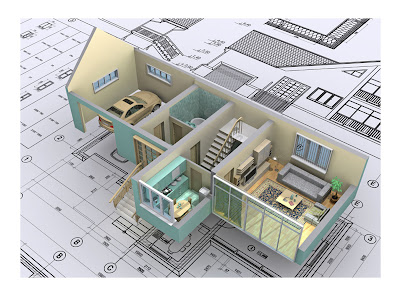
Our design project that we spoke of back in August is poised to begin construction. We're as excited as the homeowner to get this project underway and see the house start to take on its new shape and personality.
Choosing a contractor can be a confusing and time consuming task. What may be of greatest importance to your peace of mind--and wallet!--is choosing wisely. First and foremost; Make sure the contractor knows who's driving the bus by taking the wheel yourself right off the bat.
Our informed and process-educated client prepared a bullet-list of expectations which each contractor interviewed was asked to return, along with their respective bids.
See the list below:
BUILDER INTERVIEWS
Deliverable: All the following to be included with bid package, in writing, the week of________________.
1. List current and past five jobs, include names, phone numbers, and addresses.
2. Describe projects similar in scope to this one.
3. Describe communications process – review project bid with primary contact
and have regular access.
4. Relationship with subs – how selected, how contractors work.
5. History and description of the firm and principals, with key employees.
6. Current financial performance and proof of viability.
7. Timeline: project sequence, dates house should be vacated, possible delays.
8. How to assure materials are available and avoid delays.
9. Related projects: fencing, landscaping, foundation, roofing, HVAC, generator, plumbing, electrical.
10. Dates house should be vacated, if required. (FIRM)
11. Project costs: materials, labor, contingencies, economies of scale, ways to shave costs.
12. Breakdown project budget/bid by:
• Physical area of work/project
• Cost category – materials, labor, etc
• Timeline – monthly or incremental billing
13. Insurance coverage.
14. Warranty description.
15. Payment terms.
16. Contract terms, penalties, reconciliation.
17. Licenses
Not only does a list like this help the homeowner by spelling out details of the project, but it also tells the contractor up front that a close eye will be kept on all aspects of the project, and sets up your expectations for the communication process during construction. Though it may mean additional work for the contractor, a reputable one won't mind taking the extra time to complete these questions. And trust me, that is the kind of contractor you want on your job!
Material choices are already underway, so ground will "break" soon. Keep a keen eye out for this one!

 Once all pieces are cut and attached to the wall, fill any cracks and nail holes, then prime and paint. You will instantly have the look of expensive paneled wainscoting. Hey, if you get really confident, you might even try a faux-wood finish! Ya know, it just feels good to create something with your very own hands once in a while!


